Thursday, March 31, 2016

An Easter Eleena Dress


I made my daughter an Eleena Dress for Easter. I love, LOVE, how it turned out! It just might be my new favorite. 


You won't see any Easter baskets in this post, however. Not because I didn't want one in the picture but because these pictures were taken after the fact. On Easter the weather was a bit chilly and I was caught up the madness...cooking, cleaning, helping the Easter Bunny, etc. I did manage to get a video of the of the big egg hunt though. Yay me! I am going to be happy with myself for all that I did get done, and not be upset over the things I didn't get done. It was a great day with my family and that's what matters.


Keilana picked out this beautiful vintage looking fabric designed by Gertie. It looks lovely with the vintage design of the Eleena Dress. What a great pick! I've got a fashionista in training right here.


I only made two small modifications to the pattern; I added piping to the collar and sleeves and I used a pretty lace zipper instead of an invisible zipper. I didn't have a coordinating invisible zipper on hand but I have quite a few of the lace zippers, so why not, right? They are so pretty!
Actually, I didn't any coordinating piping either, so I made some. But I was all out of cording, so I used cotton yarn. I worked surprisingly well for the look I was going for. It is smaller than standard piping, and kinda flattened out a little. But I love the subtlety; it's perfect.


And for all the girly girls, this dress has got some great twirl factor. 


If you love this dress as much as I do then you can find it Coffee & Thread.


Thanks for stopping by!


Thursday, March 24, 2016

How to make a button back Trinity Tee

For those who hate zippers, or just want something different on your Trinity Tee, I have a new hack for you - How to make a button back Trinity Tee. It's super easy!


These illustrations demonstrate how to make the button opening for a Trinity Tee with an invisible neck binding. But with a small tweak you can also make it with a visible neck binding. I will let you know of any changes when we get there ;)

You will need one button in any size and a piece of round elastic long enough to go around your button + 3/4".

We are going to start much like we did when making the zipper option.


1. Measure down the center back seam allowance 3-4" and mark it. 


2. Starting from the bottom of the shirt, sew up the seam allowance (right sides together) until you reach your mark. Back stitch, then continue up the rest of the way using a basting stitch.


3. Press seam allowance open.


4. Using your seam ripper, carefully remove your basting stitches.


5. Topstitch seam allowance 1/4" to both sides of seam. Stop where seam opening begins.


6. Fold neck binding in half with wrong sides together and press.

*If you are making the visible neck binding option you will prepare your neck binding the same as the zipper option in the pattern tutorial.*


7. Sew neck binding to right side of neckline. Fold out the seam allowance and match the short end, raw edge of neck binding with raw edge of seam allowance. Place elastic between neck binding and shirt just 1/2" from the top edge. Sew the short end with straight stitch, using 3/8" seam allowance. Your stitch should land in the fold line on the seam allowance.

*For visible binding you will attach binding to wrong side of neckline. Do not attach the elastic yet. We will come back to that.*


8. Clip corners and trim back elastic if you have extra sticking out. Careful not to cut too close to the seam or your elastic may come out.


9. Turn corners right side out and push out corner. Press neck binding up, away from shirt, then down to inside of neckline. 

*For visible binding you will press seam allowance down, press binding up away from shirt, then down to right side of neckline.*


10. Topstitch around opening 1/4" from edge and across the bottom. Topstitch neck binding 1/8" from  lower edge. 

*With the visible binding you will now tuck your elastic (folded in half) between the binding and shirt before topstitching. *


11. Attach your button and you are done!

This is a fun, different way of making the Trinity Tee. I hope you enjoyed this little tutorial.


Tuesday, March 22, 2016

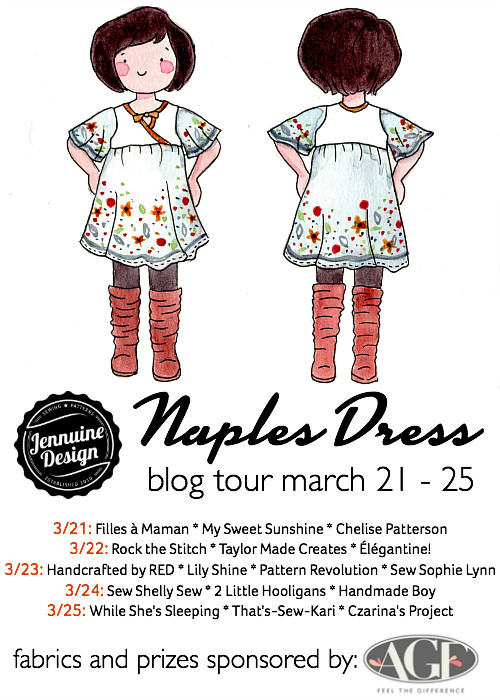
A very sweet Naples Dress - Blog Tour: Day 2 (with a Giveaway!)


Today I am joining up with A Jennuine Life for the Naples Dress Blog Tour.
The Naples Dress pattern is the latest release from Jennuine Designs
This dress was made using fabrics from the Pat Bravo Essentials II line generously donated by Art Gallery Fabrics. Thank you Art Gallery Fabrics; we love them! These wovens are made with 100% PIMA cotton and have a lovely smooth hand.


Though the first thing I noticed about the Naples Dress when I saw it was the fun sleeves, my favorite detail is the neckline. This dress pattern has a crossover neckline that is shaped so that it gives a keyhole-like look. The neckline can then be finished with bias tape to tie or button, or a wide bow. I made the bias tie option. I wish I would have made the ties a little bit longer though. It isn't quite long enough to make a bow; not that my daughter cared. She loves it the way it is; but I think I might remove the ties and make a button version.


The little basket was completely my daughter's idea by the way. I have learned that allowing her to use props if she asks for it makes the photoshoots much easier. And with all these lovely daffodils blooming in my backyard the basket was perfect for holding the picked flowers.


Okay, so back to the dress! My daughter also chose each option she wanted for the neckline, sleeves, and skirt. This is the A-line skirt version. I love the lines of the A-line skirt, but if you prefer a fuller skirt there is also a gathered skirt option. Furthermore, both skirt options can be made in dress or tunic length.


I was a little bit surprised that she chose the long bell sleeves because in the past she wasn't so crazy about this style. However, I think it was a perfect choice. The bell sleeve lends wonderfully to the bohemian feel of this dress. She just wanted to keep lifting her arms and twirling about.
The other sleeve options include butterfly, and mid length bells. And there is also the sleeveless option, of course.


Another lovely detail of this pattern is the hi-lo empire waist. How fun is that? I added piping along the waistline because, hello, it's piping! We love piping.


When my daughter finally took this dress off she ran to the laundry room and exclaimed that she wanted to wash it so she could wear it for Family Engineering Night at her school. Yeah, that's definitely a win!


 Do you love it? Yes? Then I have good news for you: Get 25% off your entire order with code NAPLESTOUR through Sunday March 27th! (Bundles excluded)

But that's not all... Enter to win a fat quarter bundle of Pat Bravo Essentials II fabrics and 3 patterns from Jennuine Designs!

a Rafflecopter giveaway

Please also stop by and see the other lovely Naples Dresses on the tour today at Taylor Made Creates and Élégantine!

Naples Dress Pattern by Jennuine Design